Introduction
Hello, lately I have been trying to deploy a custom Docker image into my local Kubernetes cluster. It turned out I needed to host my Docker image on a container registry, either Docker Hub, which is not suitable for my use case, or deploy and use a local registry. During my research, I found Gitea, which I liked as it allows me to deploy all my projects on it and also host the containers.
Prerequisite
* kubernetes cluster
* external server(S3,NFS) for dynamic provisioning
* metallb installed
Create PVC for NFS Server
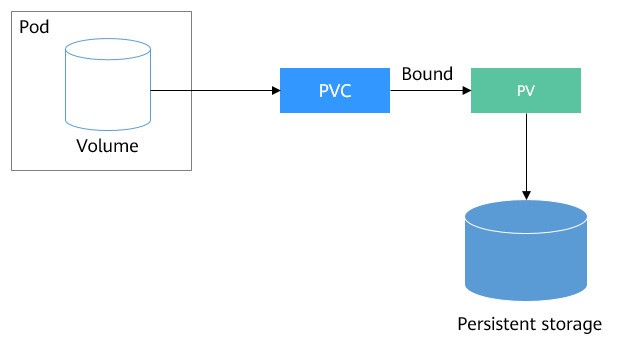
With the help of Proxmox, I created a VM and configured it as an NFS server on 192.168.1.109. To use this server in our Kubernetes cluster, we need to create a StorageClass and then create a PVC that points to that class so pods can use it.

| |
Then we create a PVC, linking it to the storageClassName:
| |
If we want the deployment to store its volume in NFS, we define volumes with the argument persistentVolumeClaim = nfs-test. Here is an example:
| |
Deploy Gitea + PostgreSQL + Redis
To facilitate deploying resources into Kubernetes, we use Helm. With one command and changing a few values, we can deploy our resources. Before deploying, when I was reading the Gitea chart, I noticed Gitea requires PostgreSQL and Redis to be deployed alongside it to save its configs and states.
So let’s create a file ‘values-gitea.yaml’ and add the default chart values.
Then change the following values:
| |
I disabled the deployment of Postgres-HA because I didn’t need it for my use case. However, if you’re deploying for your organization where multiple users are pushing and pulling, you may keep it enabled.
Now to deploy the Helm release with the modifications, run:
| |
NOTE: You need a cluster with an internet connection to pull the Docker images.
NOTE: If you don’t specify the namespace, it will choose the ‘default’ namespace.
Now, we wait until the images get pulled and deployed. You can watch the pods by running:
| |

After all the pods are deployed, to access Gitea, we need to either open a port or create an ingress. Let’s try the port-forwarding mechanism for now to test the app:
| |
Now go to http://localhost:3000 and test, you can login as gitea_admin, password: r8sA8CPHD9!bt6d
To access Gitea from another pod, CoreDNS provides a default resolving mechanism in the form: service_name.namespace.svc.cluster.local. In our example, the DNS for Gitea is: gitea-http.default.
Deploy Controller Nginx
For testing purposes, port-forwarding may be a good solution, but if we want a more reliable solution and even attach a domain with HTTPS to the Gitea service, we need an ingress.
To start with ingress, an ingress controller is needed. We will choose the most popular one: nginx-ingress.
following this article, choosing helm install, I got the below command to run:
| |
If everything works as expected, you should see an ingress-controller service with an IP address from your load-balancer (MetalLB) pool of IP addresses.

Great, to expose Gitea, we will change the previous chart file ‘values-gitea.yaml’ values:
| |
here we instructed to create an ingress rule:
- className is needed if you have multiple ingress controllers installed
- the host part tell ingress to accept any request with domain or  host header : gitea.homelab.local and forward it to gitea instance
To redeploy the release with the new configuration, we run:
| |
If we check the ingresses, we can find Gitea ingress has been created. To test it, we will query the IP address of the ingress, supplying a custom host header: gitea.homelab.local.
| |
Deploy bind9
You may notice that accessing Gitea from a browser isn’t possible because the local DNS server doesn’t have knowledge of the domain: homelab.local. The solution is either to modify the /etc/hosts file or create a CT in Proxmox and host a DNS server there.
I went for the second option, hosting a DNS server because my homelab may require a variety of services in the future, and I want them to be mapped to a domain for all the connected devices in my network.
For the DNS server, Pi-hole may be the most popular option for ad-blocking and adding DNS records, but I experienced a few bugs with serving DNS, so I went with the second option: Bind9.
I read this article
I created a CT in proxmox and assigned a static ip 192.168.1.114, don’t use dhcp because it may change if CT restarted. So here are my configuration
my local ip address: 192.168.1.104, ingress ip address: 192.168.1.148
filename: /etc/bind/named.conf.options
| |
filename: /etc/bind/named.conf.local
| |
filename: zones/db.homelab.local
| |
filename: /etc/bind/zones/db.168.192
| |
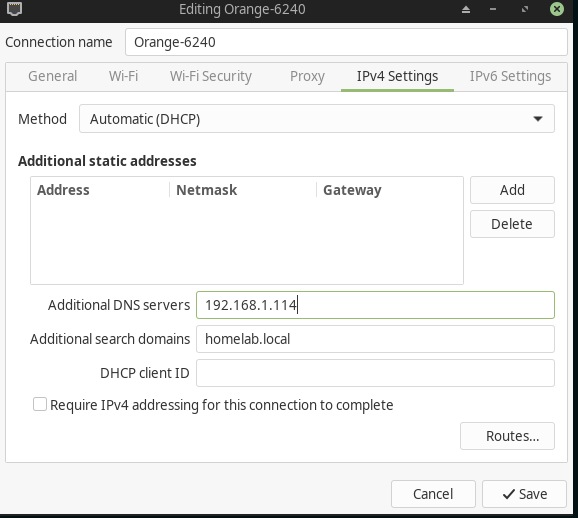
once the the bind9 configured and it’s working, we need to add the dns server ip address as an additional one, am using NetworkManager:

Add TLS
Now, if we try to login into to the Gitea registry using the below command:
| |
It will return an error claiming the registry domain needs a TLS certificate. We can work around that by adding the registry domain to /etc/docker/daemon.json, but it would be more useful if we create a TLS certificate and append it to the domain.
We will start first by creating the cert. I chose mkcert because my first search led to it 😄.
| |
It will generate two PEM files: a public key and a private key.
We will create a TLS secret and append the two created files from mkcert:
| |
Finally, we append the gitea-secret into the ingress by changing the gitea-values.yaml file:
| |
Now, we can visit gitea.homelab.local and login to gitea registry without issues.

Change nginx config for pushing the image
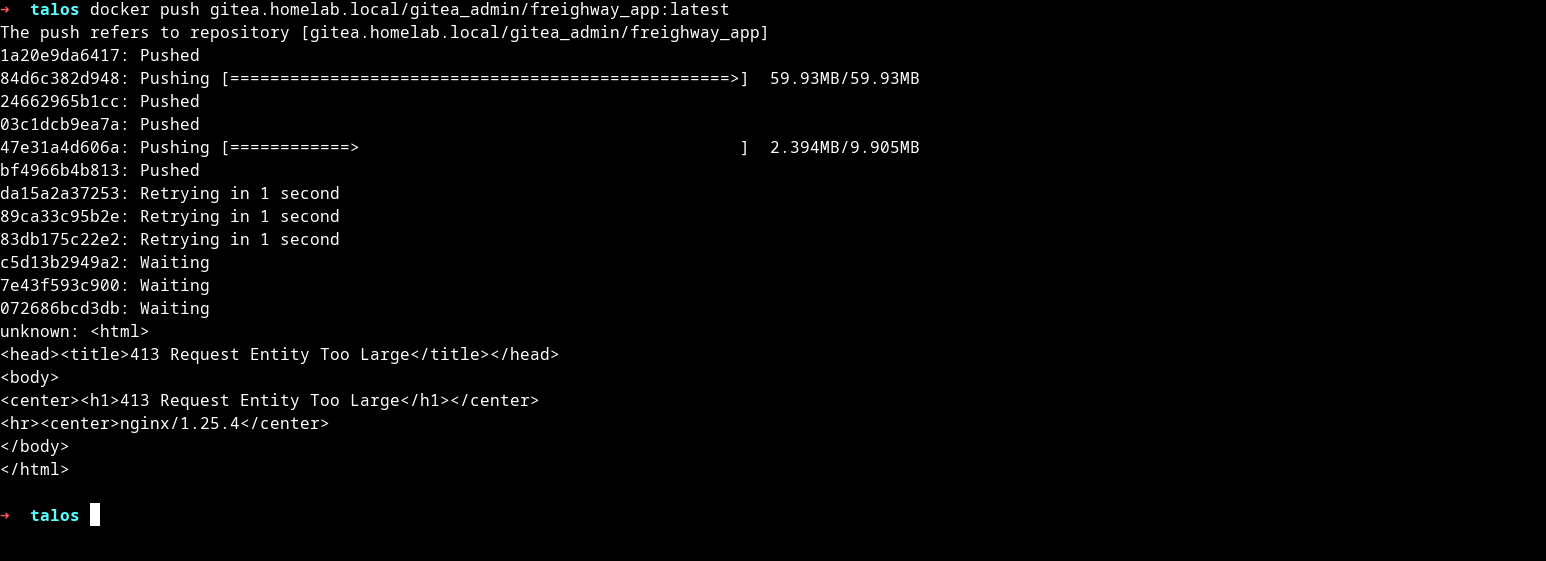
We deployed Gitea with one main purpose in mind: pushing containers to the registry. However, if we try building a local image and pushing it, you may face an error saying: “413 Request Entity Too Large”!

This is because by default Nginx imposes a limit of 1MB for uploading media files. To change that, we add an annotation for ingress to remove the limit:
| |
then we update the release chart
| |
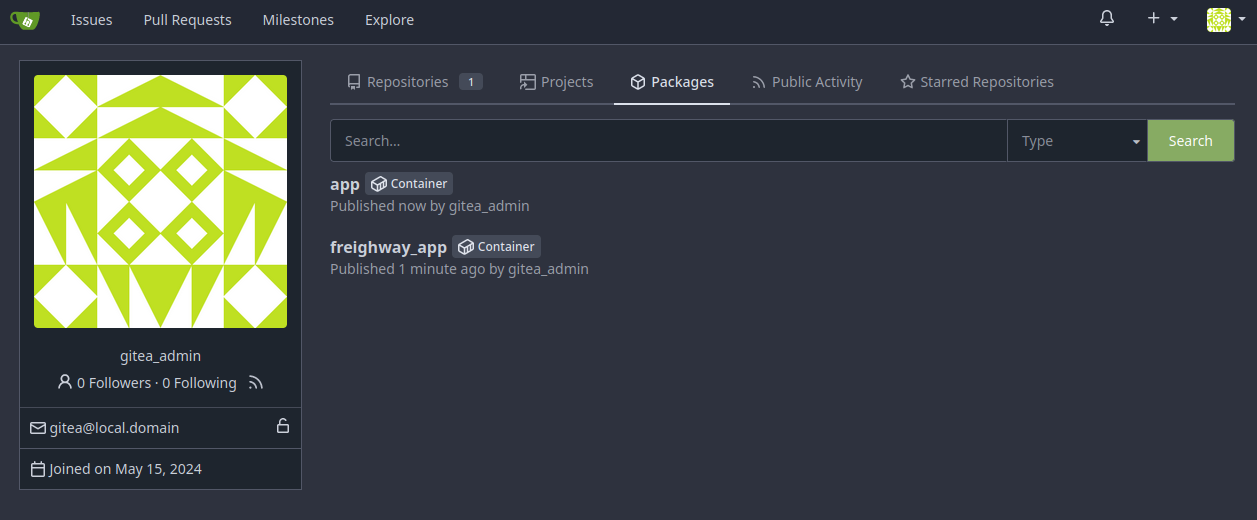
Now, we can push the image: gitlab.homelab.local/gitea_admin/app:latest

if you have created another user instead of gitea_admin, you can replace it in the above command.
Add Bind9 Server in CoreDNS
We have done everything from deploying to adding TLS cert, but if we tried to create a deployment with the deployed image as an example
| |
after applying the yaml, if you run kubectl describe deployment/app_name you may notice in the events section that it’s stating pulling the image has failed, that’s logical because kubernetes cluster doesn’t know about our custom domain: homelab.local.
So to let kubernetes DNS server: CoreDNS, acknowledge our domain we gonna need a litle tweak into the CoreDNS config
we run the following command to open the editor with configmap:
| |
and then we add the reference to homelab.local
| |
and for the CoreDNS to take effect, we will restart it with :
| |
Now, to test things out you can redeploy the previous deployed yaml or just run an alpine with nslookup
| |
it should return the ip address of the ingress.
